
Apple Bunnies and More: Decorative Apple Cutting Techniques

Apples are such great fruit - available almost any time of the year, inexpensive, and handy. While simple apple slices or even a whole apple are welcome additions to a bento box, if you just spend a few minutes cutting the pieces in decorative ways, they can really perk up your bentoscape, as Tracy showed us in the last post.
We sort of grow up in Japan knowing how to do some fairly simple apple cutting techniques. (Or at least, I remember my mother and aunties doing this sort of thing when I was little.) Here are some that you could use, from the basic to the more complicated.
The equipment and supplies you need
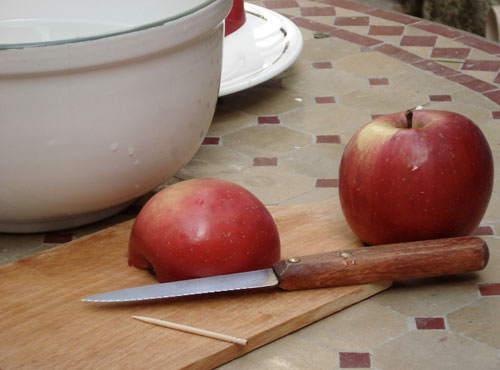
All you need to cut your apples are shown here. A cutting board, a sharp small knife (here I have a serrated one, but a smooth bladed one is better really), a toothpick, and a bowl filled with acidulated water (cold water with some lemon juice in it) to dunk the apple slices in to stop them from turning brown.
Basic technique: Apple bunnies (Usagi Ringo)
Apple bunnies, or usagi ringo (うさぎりんご)are the most commonly seen decorative apple cut. It's also one of the most simple, so while I've already written a tutorial on how to make them (way back in 2004), and there are several other tutorials out there, but I thought I'd go over it again to establish some basics of decorative apple cutting.
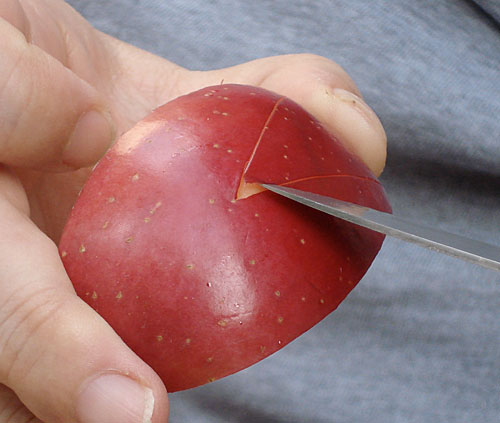
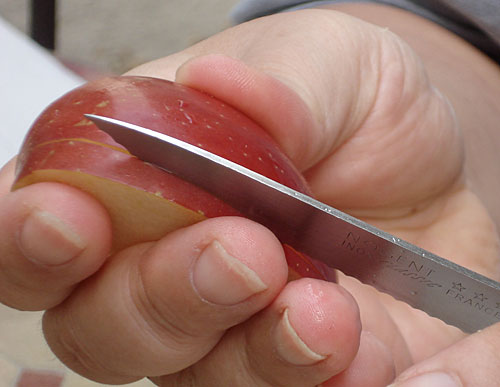
First, cut out a wedge from the apple, and cut out the core. Score the skin with a V shape with your knife, as shown.

Carefully lift out the center V point (the part you're going to cut away) with your knife. This helps to make a clean point there.
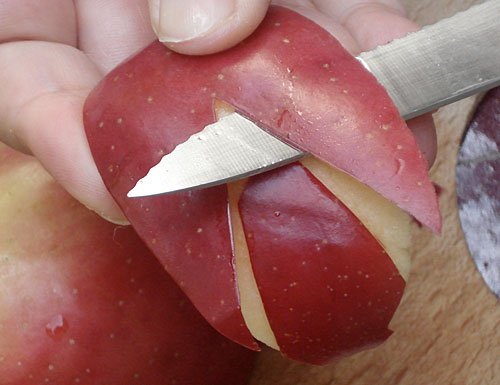
Cut under the outer points (the ears) fairly close to the skin. Cut them all the way down to the center V point.
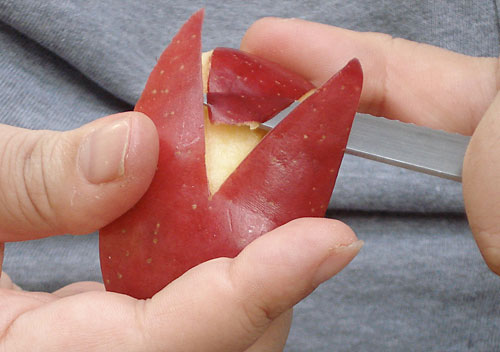
Peel away the center skin, taking care not to cut into the ears.
Voilà, your apple bunny! You can cut eyes in, stick in cloves there, or just leave the 'face' bare, for a modern minimalist bunny.
After you've finished cutting, dunk the apple wedge into the bowl of acidulated water. You might want to dip the wedge while you're working on it, if you see it turning brownish. This will also make the bunny ears stick up and curl up a bit.
So to review, here are the basics of decorative apple cutting:
- Cut out a wedge and cut away the core.
- Score the surface with a sharp knife.
- Cut away the parts you don't want, working from the corners first.
- Dunk in acidulated water to stop it from turning brown.
Intermediate: Checker pattern apple (Ichimatsu moyou ringo)
A two-color checker pattern is called ichimatsu moyou (市松模様)in Japanese. It's a decorative cut that's appropriate for any bento. You can make the pattern as small or as big as you want. This cut is not hard, but is a bit fiddly.
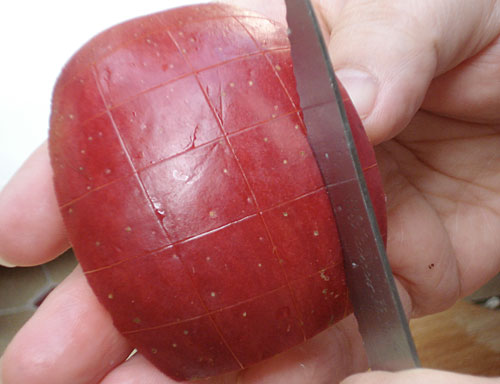
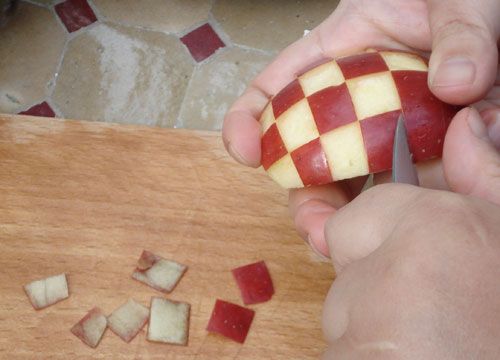
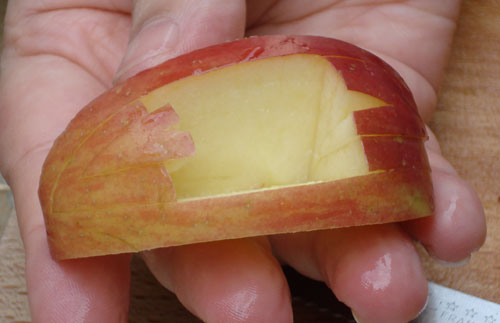
Start with a fairly wide apple wedge. Score the surface with your knife in a checkerboard pattern. Make the checkerboard as evenly spaced as you can.
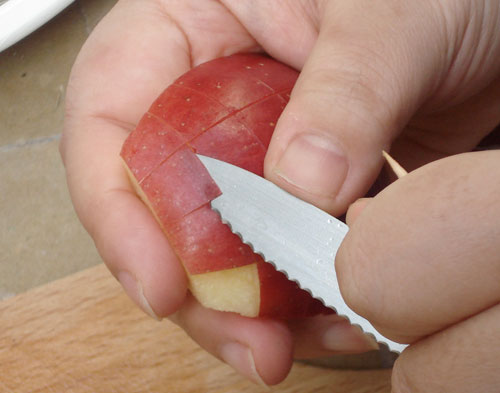
Then all you do is to cut out and peel/pry off alternate squares of skin, using your knife or (if the checkerboard is very fine) the tip of a toothpick.
Keep going, taking care not to cut into the 'on' square skins. You can tidy up any rough edges later.
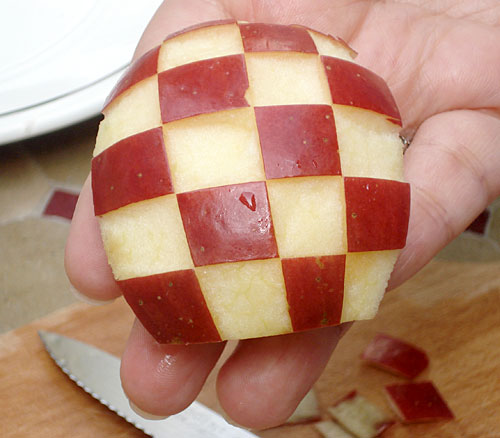
Here's a finished wedge. Looks rather modern doesn't it?
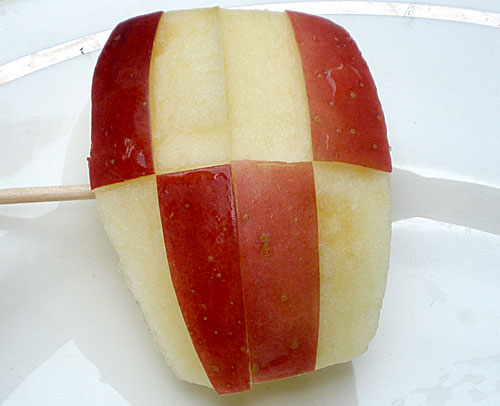
Here are two thin wedges with one big checkerboard cut into each (so you have a cross pattern). The wedges are skewered together with a toothpick. This is even easier to do than an apple bunny.
You could use this basic score-and-cut-away technique to make all kinds of decorative surface patterns.
Advanced: Apple leaf (Konoha ringo)
This is a more advanced cut, that may take some practice, but the results are rather spectacular. If you have the time and patience these are very nice as party-buffet type decorations.
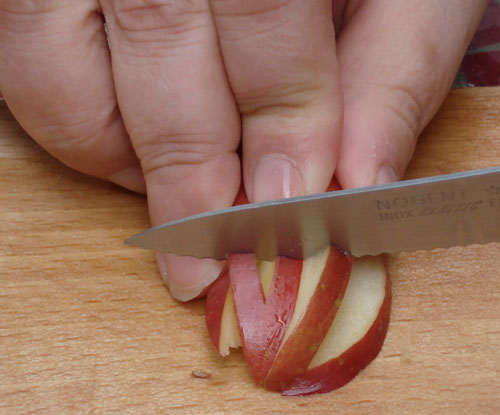
First, cut out a wedge of apple. Carefully score the wedge about 3mm / about 1/10th of an inch from the edge.
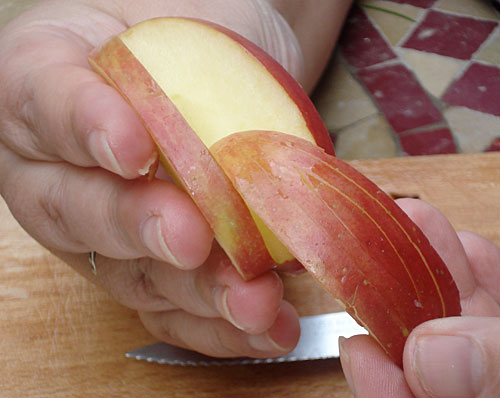
Cut along the score, parallel to the sides of the apple, down into the wedge in a V. Your aim is to cut out a smaller wedge, like so.
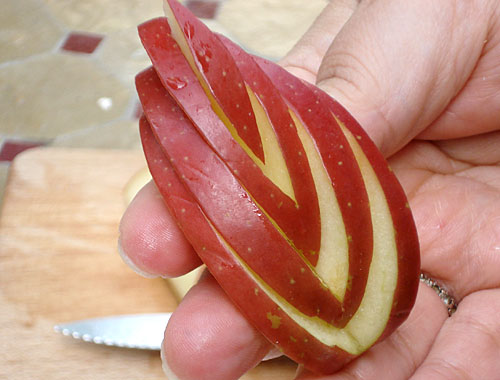
Cut two more smaller wedges into the apple, so that you end up with 4 nested wedges, as shown here. (Pro chefs can cut out even more and thinner wedges, but 3 is enough for us amateurs.)

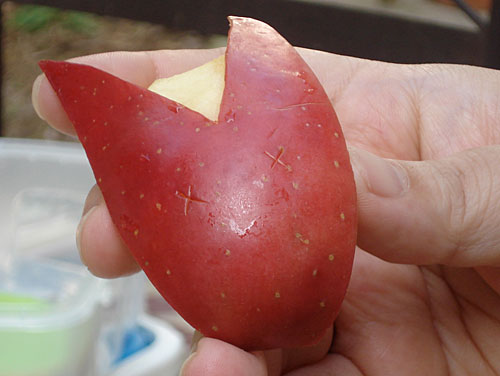
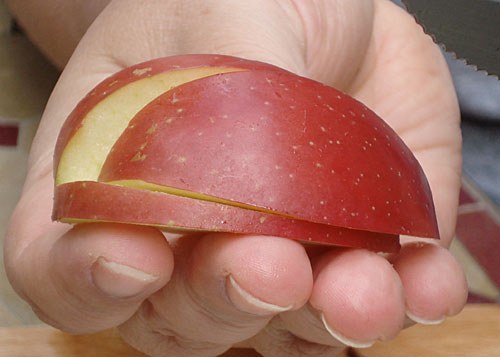
Carefully slice back the wedges, staggering them. You'll end up with this, which looks a bit like a 3-D leaf with prominent veins. Dunk in acidulated water.
Apple Boat (Fune ringo)
This is a variation on the apple leaf.
Cut out the inner wedges as for the apple leaf, and slice them out of the outer wedge.
Cut both ends of the inner wedges.
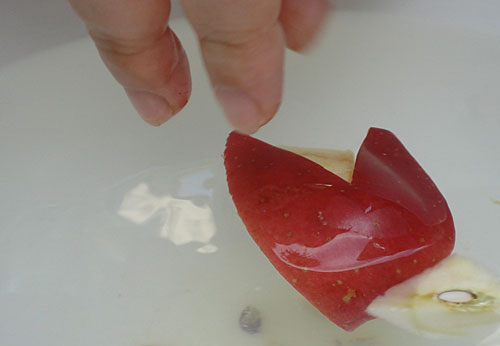
Re-assemble the inner wedge ends inside the outer wedge as shown, to form a sort of boat shape. You could put some things inside the boat - how about a little row of blueberries for example?
Each of these techniques can be used on other thin skinned yet firm fruit, but the results are most striking when there's a strong contrast between the color of the skin and the flesh inside. I hope you try them out - remember, practice makes perfect! (For what it's worth, the apple bunny took me about 3 minutes, the checkerboard apple 5, and the apple leaf and boat about 8 minutes each.)
If you enjoyed this article, please consider supporting this site by becoming my patron via Patreon.